Free Crochet Christmas Shoes Pattern for Beginners
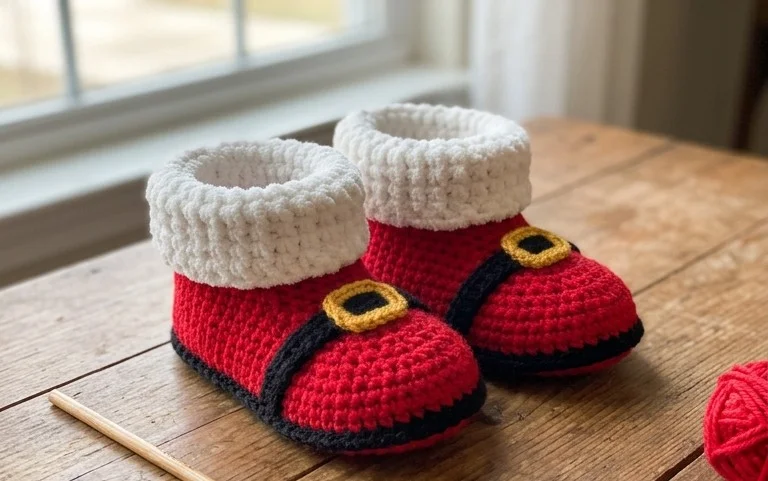
Soft yarn and a touch of holiday color give these crochet Christmas shoes a cozy, festive look, with a shaped toe and a trim that makes each pair feel ready for the season. They make a thoughtful handmade gift and can be brought out for family celebrations or displayed with other Christmas keepsakes. Beginners can enjoy practicing basic crochet stitches while learning how careful shaping turns a flat piece of yarn into a shoe. The pattern explains the construction and finishing so you can follow the shape as it grows, rather than guessing where to add or adjust stitches. You’ll also find guidance for neat edges and simple color changes, helping the finished pair look tidy and comfortable. Set out your yarn and hook, and take the project one section at a time.
Why You’ll Love This Pattern
Firm cotton stitches give this simple dishcloth a lightly textured surface that works well for wiping counters and washing dishes. The pattern uses single crochet throughout, so you can focus on making even stitches rather than learning several techniques. It also takes only one ball of cotton yarn and is easy to carry along for short crochet sessions.
The straight rows make the cloth useful practice for keeping edges even. Make it in a solid color to check your stitch consistency, or use leftover cotton yarn for a striped version, joining a new color at the edge of a row.
This was an easy project to pick up in the evening, and the cotton made a sturdy cloth. I used a marker to keep track of my rows.
— Example review, not a verified customer testimonial
Pattern Overview & Skill Level
- Skill Level: Beginner. You need to chain and make single crochet stitches.
- Approximate Time: About 2–3 hours, depending on your pace and how often you pause to count rows.
- Construction: A flat rectangle worked back and forth in rows, with no seaming or border.
- Finished Dimensions & Sizing: About 7.5 × 7.5 inches (19 × 19 cm) after washing and drying flat. Small differences in tension can change the finished size.
Materials & Supplies Needed
- Yarn: About 75 yards (69 m) of worsted-weight (#4) 100% cotton yarn. One solid color is simplest for a first cloth; leftover cotton can be used for stripes.
- Hook: 5.0 mm / H-8 crochet hook. If your stitches are loose, try a 4.5 mm / 7 hook; if they are tight, try a 5.5 mm / I-9 hook and check the gauge again.
- Notions: Tapestry needle for weaving in the starting and finishing tails, scissors, and a ruler or tape measure. A stitch marker is optional but useful for marking the first row.
- Substitutions: Cotton-linen yarn can work if it is a similar worsted weight, though it may feel firmer. Avoid fuzzy or highly elastic yarn for a dishcloth. A different yarn weight or hook can change both the dimensions and how well the cloth absorbs water.
Gauge: 16 single crochet stitches and 16 rows measure about 4 × 4 inches (10 × 10 cm) after washing and drying flat. Make a small swatch if you want to match the finished size closely. Adjust your hook to change gauge, not the stitch count in the pattern.
Stitch Guide & Abbreviations (US Terms)
- ch = chain.
- sc = single crochet. Insert the hook into the stitch, yarn over and pull up a loop, yarn over again and pull through both loops.
- st / sts = stitch / stitches.
The turning chain does not count as a stitch in this pattern. At the beginning of each row, make one chain, then work the first single crochet into the first stitch of the previous row.
Step-by-Step Pattern Instructions
Dishcloth
- Row 1: Ch 31. Sc in the second chain from the hook and in each chain across. You will have 30 sc. (30 sts)
- Row 2: Ch 1 and turn. Sc in each stitch across. (30 sts)
- Rows 3–10: Repeat Row 2 for each row. Check that every row has 30 stitches. (30 sts each row)
- Rows 11–20: Continue repeating Row 2. Count the stitches at the end of each row, especially if the sides are beginning to slope inward or outward. (30 sts each row)
- Rows 21–30: Repeat Row 2 through Row 30. The cloth should measure close to 7.5 inches long at the stated gauge. (30 sts each row)
Finishing
After Row 30, fasten off, leaving a tail about 6 inches (15 cm) long. Pull the tail through the last loop. Thread it onto a tapestry needle and weave it through several stitches on the wrong side, changing direction once so it is less likely to work loose. Weave in the starting tail the same way. Trim the ends close to the fabric without cutting into a stitch.
Wash and dry the cloth according to the yarn label before measuring it. If the edges look uneven, lay it flat and gently shape the corners while it is damp. There is no need to add a border; the single-crochet edges are ready to use once dry.
Care & Washing Instructions
- For cotton yarn, machine-wash with similar colors in warm water, up to 40°C (104°F), unless the yarn label gives different instructions.
- Dry flat or tumble-dry on low heat if the yarn label allows it; high heat can cause some cotton yarns to shrink.
- While damp, smooth the cloth into a square and let it finish drying flat; follow the label if your yarn is a cotton blend.
Pro Tips & Common Mistakes to Avoid
- Keep your chain relaxed. A tight starting chain can make the first edge shorter than the rest of the cloth; if needed, use a hook one size larger for the chain only.
- Count the 30 stitches at the end of every row. Put a marker in the first stitch of a row if you tend to miss the last stitch when turning.
- Weave in each yarn tail on the wrong side, passing the needle through the backs of several stitches and changing direction. A short tail can come loose with repeated washing.
- To make a wider cloth, add chains while keeping the same row height; every additional chain adds roughly one stitch of width and uses more yarn. For a longer cloth, add rows, with each extra row also increasing yarn use.
Frequently Asked Questions
Can I use acrylic yarn instead of cotton?
You can, but acrylic usually absorbs less water than cotton and may feel different against dishes. For a useful dishcloth, choose a smooth cotton or cotton blend and check its care label before washing.
How can I make the dishcloth larger or smaller?
Change the starting chain for the width and the number of rows for the length. Keep the chain count above 1, and remember that a larger cloth takes more yarn while a smaller one takes less. Check the fabric as you work because changing the hook or yarn weight also affects the dimensions.
Is this pattern suitable for a first crochet project?
Yes. It uses only chains and single crochet stitches worked in straight rows. The main thing to watch is placing the first and last stitch of each row so the sides stay even.
Can I sell dishcloths made from this pattern?
Check the designer’s terms before selling finished items, and follow any requirements for credit or pattern use. Use your own photos and description for products you make, and do not claim someone else’s pattern as your own.
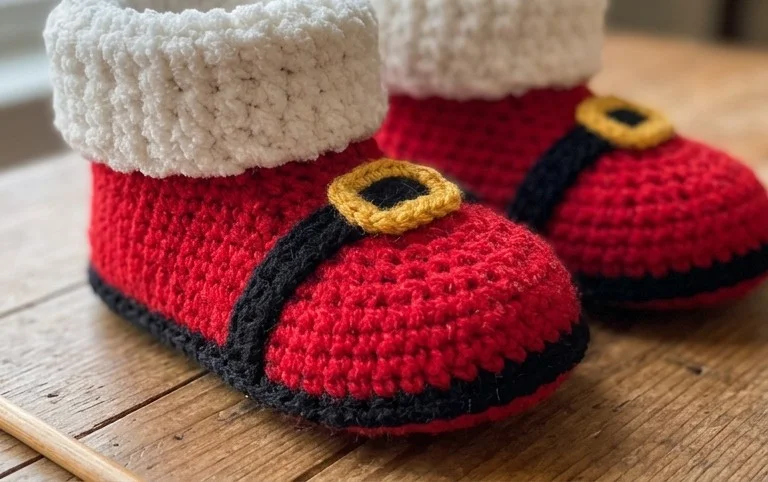
Once the last stitches are finished, you’ll have a small pair of Christmas shoes with a handmade touch that feels right at home among the season’s gifts and keepsakes. Try a different color combination, such as cream with red trim, or use a soft yarn in a size that suits your recipient. Take a photo of your finished pair and share it on Pinterest or your favorite social platform; seeing how other makers choose their colors is part of the fun. If you enjoyed working through this pattern, browse the blog for more free crochet projects, from seasonal makes to useful pieces for everyday life.